Sep 11, 2025
Improve Soil Health, Plant Health and Yields on Your Organic Farm
Read More
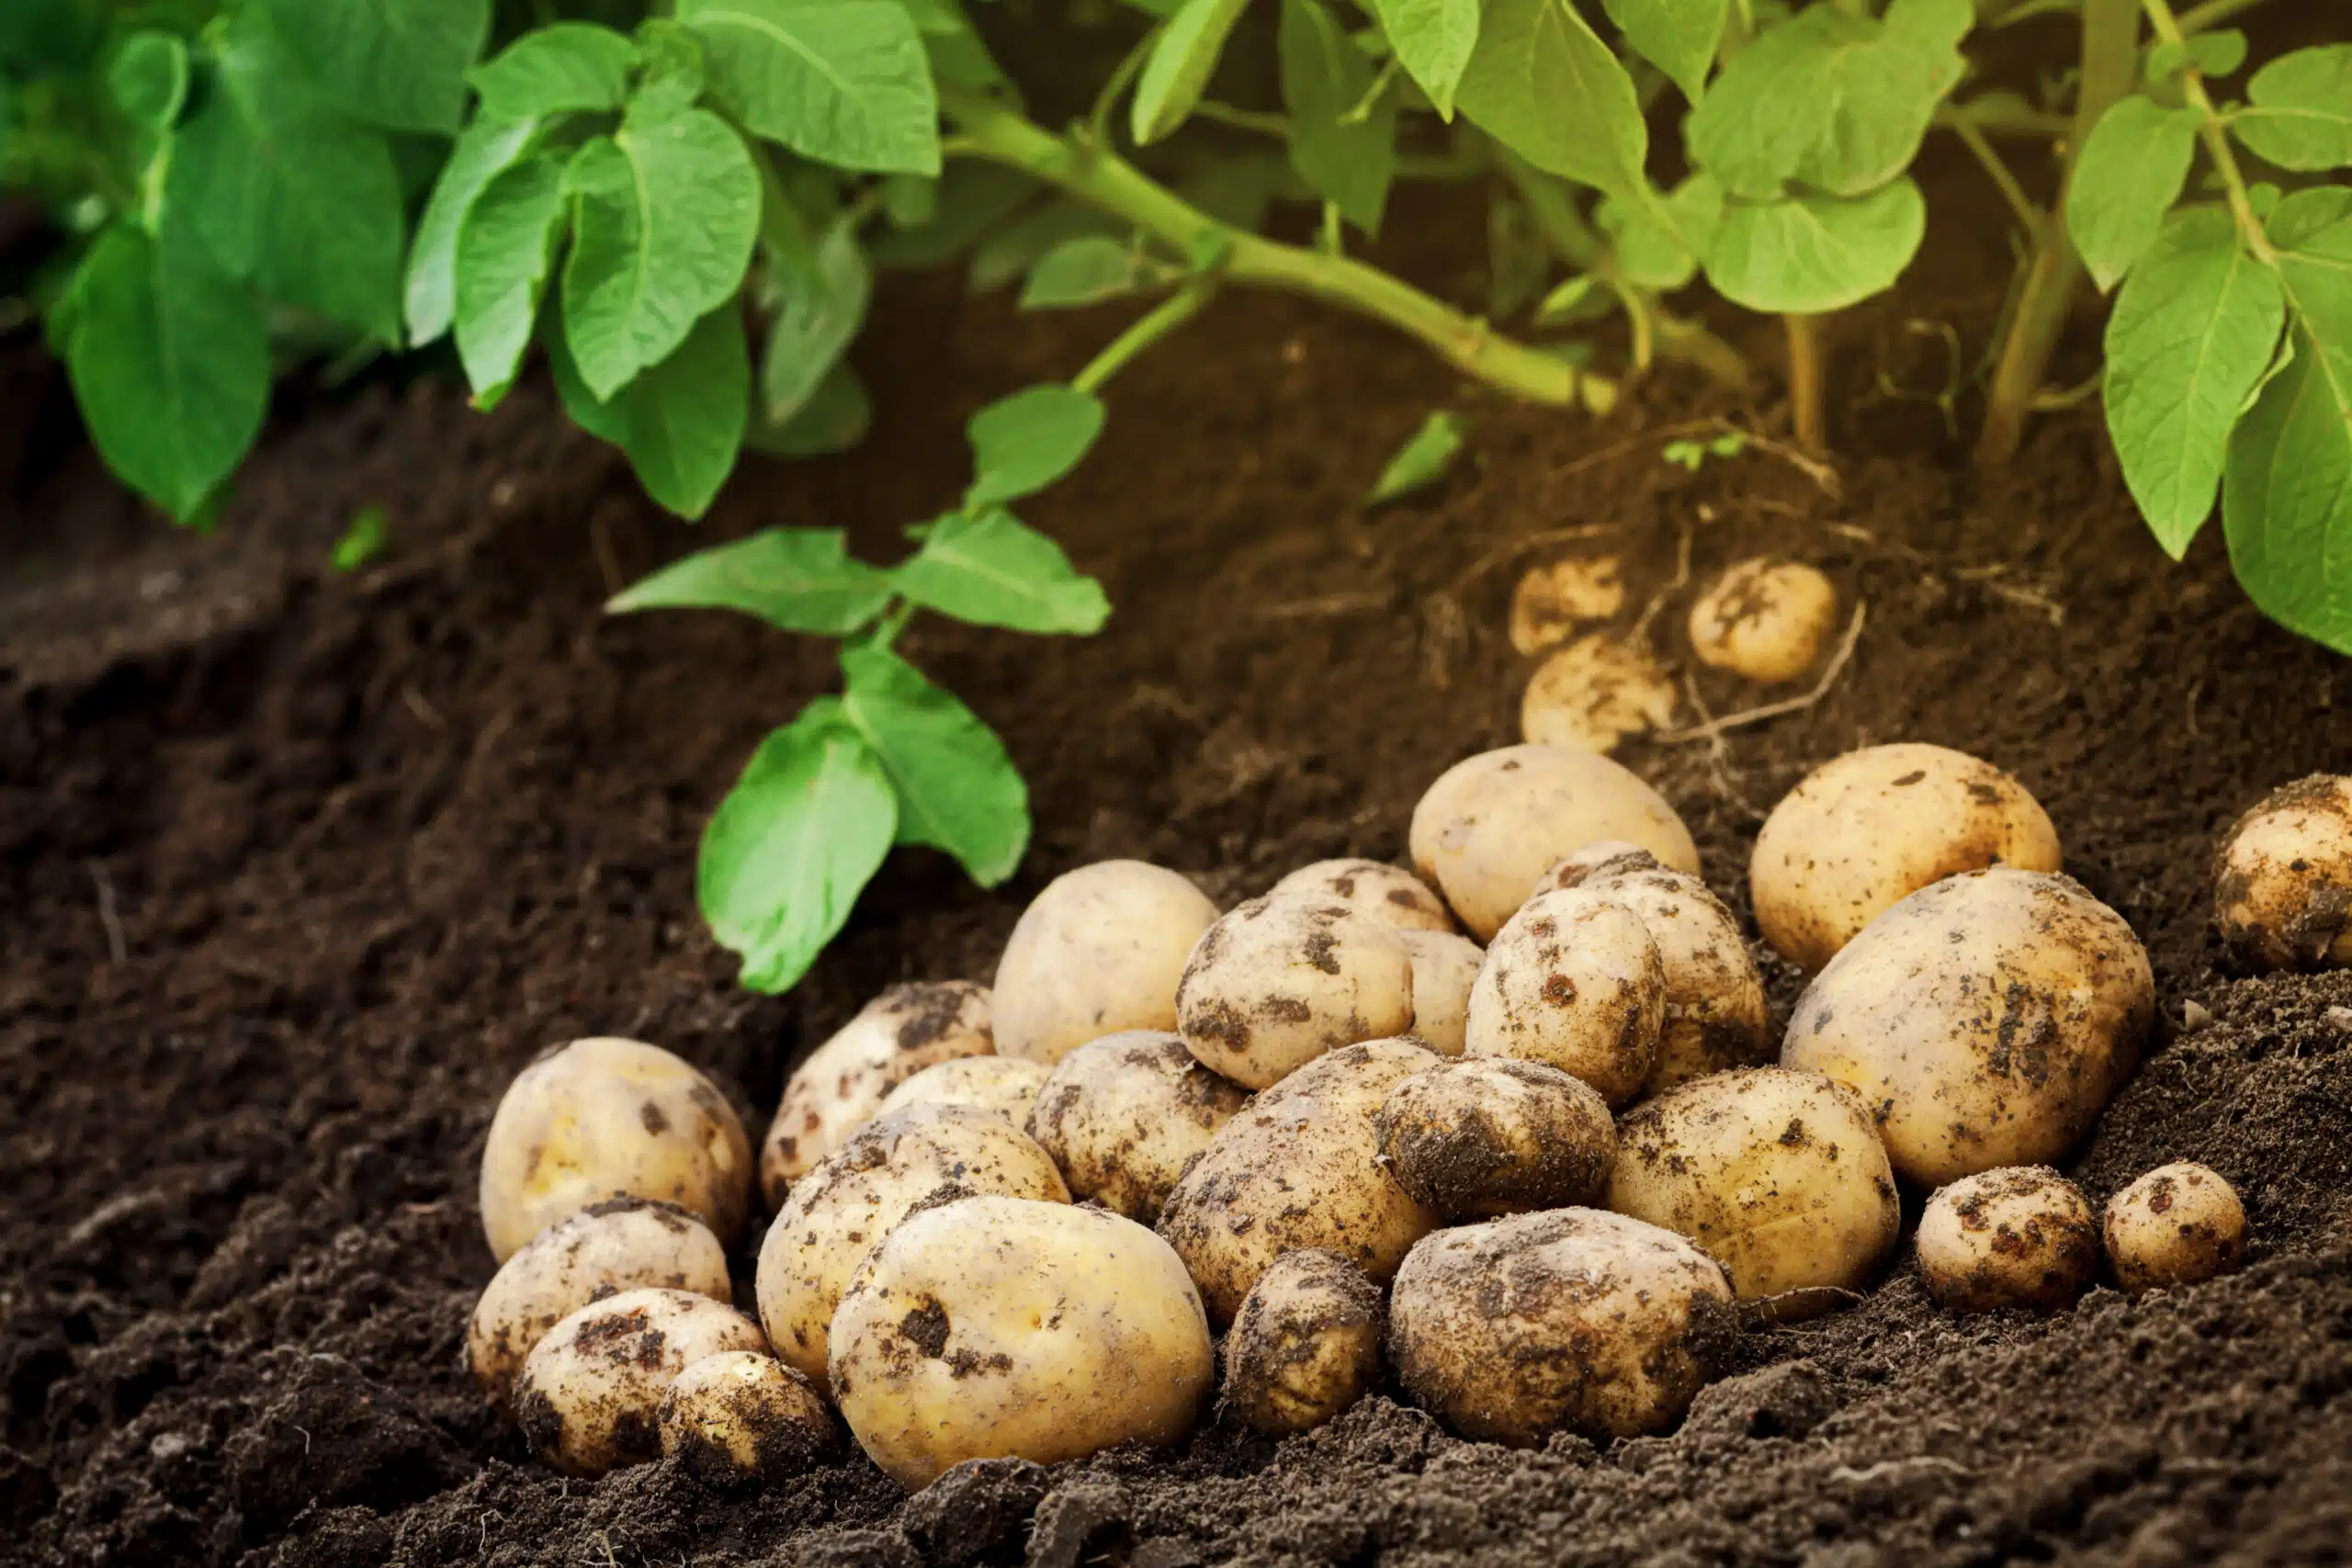
When your soil is healthy, your crops flourish. Your fields can manage excess or a lack of water. There are biological signs of healthy soil, like great soil structure, earthworms, and other beneficial arthropods. Your crops can access more nutrients via vigorous roots, and experience less abiotic stress.
Yet, there isn’t a silver bullet to healthier soil. Quick fixes rarely have long-lasting, yield- improving results. It takes regular testing, adjustments, and partnering with experts to build your soil health over time.
The easiest place to start building healthier soil is with one of these simple and cheap soil tests.
Soil health is the interaction between organisms and their environment and the properties provided by such interactions. In simple terms the biological integrity of your soil, which refers to the microbial population and diversity in your field that supports your crops growth.
It’s essential to farm and ecosystem functions.
Healthy soils regulate water and aid in the infiltration and penetration of precipitation. It’s essential for sustaining plant life by cycling nutrients and providing physical stability and support for crops. Healthy soil can buffer, degrade, and detoxify organic and inorganic materials.
Soil quality refers to how well soil functions physically, chemically, and biologically. You can think of this as how well it does its “job”, meaning how well does it support crop production
A holistic approach for soil management requires growers to consider the physical, chemical, and biological characteristics of their soil.
Chemical analysis is likely the most widely used soil samples growers are utilizing today. Chemical analysis analyzes nutrients in the soil, base saturation as well as pH and CEC. Some things a lab can look at include:
pH: This can impact crop growth and nutrient tie up.
Macro and micronutrients: Soil that is deficient or has tied-up nutrients (N, P, K, Ca, Mg or S) often produce lower yields.
CEC (Cation Exchange Capacity): This measures the nutrient holding capacity and sodium in the soil.
Salinity: High levels of salt can impact the physical structure of the soil and be toxic for plants.
You can find signs of biological health of your soil by sight, smell and touch. The soil surface, plant roots structure, and evidence of compaction layers are some indicators of the health of your soil. Yet, there are valuable tests that will give a detailed understanding of the biological integrity of your soil or create a baseline of the biology of your soil before you begin implementing new soil health practices.. Components of biological soil health include:
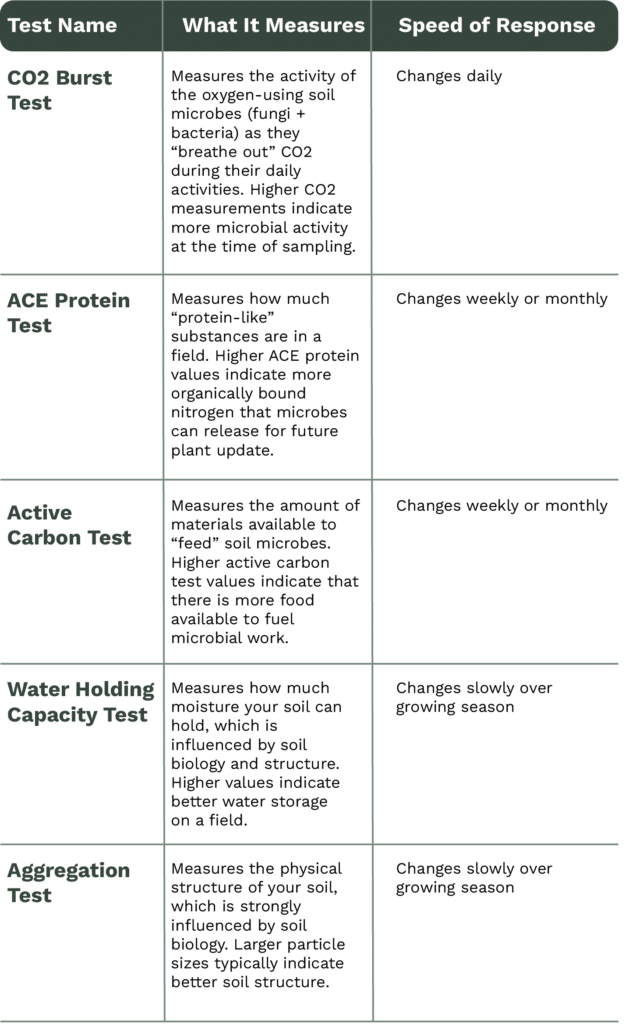
Soil proteins: Assesses nitrogen from proteins in the soil which will become available for plant uptake.
Organic matter: The organic matter in your soil influences water holding capacity and nutrient availability. The amount of organic matter in your soil is heavily influenced by regenerative farming practices like reduced tillage, crop rotation, and cover cropping.
Active carbon: This measures the carbon-containing compounds which are broken down by microbes for food.
Respiration: The amount of CO2 in the soil, which can be an indicator of soil microbial activity.
Soil microbes: The activity, abundance and diversity of microorganisms in your soil. Soil microbes peak in early summer, with a slight decline in late summer and a low point during the winter. At first frost there is a slight burst, but then activity reduces until there are consistently warmer temperatures.
Macroorganisms: The activity, abundance and diversity of larger organisms (like earthworms) in your soil.
To get a closer look at your biology, like the abundance and diversity of your soil microbiome, consider a lab soil test.
Physical measurements are the easiest to see with the naked eye and are integral to a wide range of soil functions.
Available water capacity: How much plant available water your soil can hold. Some labs can determine this for you with a soil test.
Water infiltration rate: How quickly and how much water your soil can absorb. While an infiltration ring is best for gathering this information, you can also observe how quickly water infiltrates or how long water is standing water after rainstorms.
Aggregate stability: Aggregates are soil particles that are held together via root exudates, fungal hyphae and extracellular polymeric substance (EPS) “glues”. Their stability refers to how well they hold up. Aggregate stability is observable on your own, but you can also work with a lab to get more information on your aggregate structure.
Soil compaction: Closely related to aggregate stability, compaction occurs when soil has a weak aggregate structure, compressing the air pockets in the soil so air and water are unable to infiltrate the soil. This is often caused by working wet soil, high tillage and excessive vehicle traffic and is easily observable in your field without a lab test.
There are lots of benefits to testing your soil regularly. Some of which include:
While there is a lot you can learn on your own, if you need to examine your soil on a quantifiable level, enlist the help of a lab. It’s ideal to lab test your soil every one to three years to get a full picture of your soil’s health and quality.
These tests can tell you basic texture and structure of your soil, pH, salinity levels, phosphorus, potassium, calcium, magnesium, sulfur and other micronutrient levels. Work with an agronomist, state extension specialist, or crop adviser to talk through test results and to make a plan to support your soil health.
Keep in mind that it can take time to get your results. Be sure to plan any inputs, field management changes, or plantings accordingly.
A soil health assessment is how well soil performs all of its functions now and how those functions are preserved for future use. This isn’t something you can measure directly. Growers should use indicators, or measurable properties, processes and soil characteristics to gather information.
Once you conduct your soil test, you may be excited to make changes in your field. Keep in mind that improving soil health is a marathon, not a sprint. Your soil is a long-term partner in your farm’s health. Some changes are ephemeral, and can happen within a day or are routinely managed. Others are intermediate and may take several years to change.
It’s also worth noting that there are some aspects of your soil that are permanent, and inherit to your soil profile or site.
There’s a lot you can learn about your soil health by simply looking at your field closely. First, take note of your soil surface, soil profile and any residue.
Shredded residue is a good sign. That means bacteria, millipedes, fungi and arthropods are present and are breaking down organic matter in your fields. Web-like root structures are also a sign of microbial activity from beneficial fungi.
You can also dig up or pull out a plant to examine the roots. Is there restricted root growth, with few fine roots and short, thick roots? Do the roots only grow horizontally, and not vertically? Or any discolored lesions on the roots? These are signs of unhealthy soil impacted by pathogens or compaction.
Roots growing in healthy soil are usually white and have uninhibited root growth (growing horizontally and vertically), with lots of fine roots.
Once you’ve thoroughly looked over your soil health, try using some of your other senses.
When you touch your soil, is it extremely hard? Perhaps you’d need a hammer to crush the clot? This is a sign of unhealthy soil – healthy soil crumbles easily under finger pressure.
Your soil should smell earthy, or sweet from the geosmin from actinomycetes. The sweet smell indicates your soil is an excellent habitat, with a soil structure that supports water infiltration.
If you notice a metallic smell, your soil may be dominated by anaerobic bacteria. A rotten egg smell indicates a hydrogen sulfide issue. High levels of NH3 ammonia will make your soil smell like urine. All of these smells are signs that your soil may need some support.
Not noticing a smell at all? That could indicate that there is little active life in the soil. This could be due to it being too cold, hot, wet, dry or the soil could simply be a poor habitat for microbial life.
Timing: Perform this assessment in the spring or autumn.
Supplies: Spade, pot, bottle of water, mat and a record sheet.
Directions:
Earthworms indicate good soil structure, health, soil life and activity. Ideally, you’re looking for 14 or more endogenic worms, one epigeic and one anecic earthworm. The presence of all three indicate your soil has good water infiltration, nutrient mobilization and carbon cycling.
Timing: During a growing season when soil is not wet.
Supplies: 150x150mm metal or plastic tubing, marked at 85mm deep, water, a marked water bottle, a stopwatch.
Directions:
Water infiltration is the rate that water is able to enter the soil. An infiltration test helps growers understand how well soil can manage water, which is an indicator of soil structure.
Soil that absorbs water at a faster rate is a sign of good aggregate structure and high organic matter levels. Slower rates could indicate compaction, reduced porosity and lower organic matter. To improve aggregate structure, consider feeding soil microbes a microbial food product.
Recommend two tests per field in the best and worst areas. Repeat annually around the same time to track signs of improvements.
Timing: Flexible timing throughout the year.
Supplies: Two glass jars, wire mesh, water to fill the jars.
Directions:
The jar test allows you to examine your soil structure. Once your soil is submerged in water, does it disintegrate in the jar or sink to the bottom past the mesh? If so, this could be a sign that your soil has poor structure, low microbial activity and low organic matter. Healthy soil, with good structure holds together despite being submerged in the water. To increase your microbial activity, consider feeding starving microbes. Up to 75% of beneficial microbes in farm soil are starving and can’t support healthy soil.
The following guidelines can help you gather more accurate samples and track changes in your soil year over year.
When your soil is unhealthy, farming is harder than it needs to be. Your fields struggle to manage water, you’ll continually have to add inputs to get crops the nutrients they need and fight off diseases. Your topsoil is susceptible to wind and water erosion.
The first step towards fixing unhealthy soil is a soil test. By identifying the problem areas of your soil, you can work with a trusted adviser to come up with solutions, and test the results over time.
Want more helpful information, just for growers, delivered straight to your inbox? Join our email list, where we share helpful, practical information growers can implement to support healthy soils so they can FARM FOREVER.
Preserving the Future of Farming
Learn more about our mission to keep farming economically and ecologically sustainable.
Learn More